
If you run a Windows VPS, your biggest risk is Remote Desktop (RDP). Internet scanners and bots constantly attack Windows servers, especially on the default RDP port 3389. This guide shows you how to secure your VPS properly using a custom RDP port, Windows Firewall rules, IP restrictions, and essential Windows security settings.
⚠ Important: Always keep at least one active RDP method working (or open VNC viewer via your browser through our client area) before you change ports or firewall rules.
What You Need Before You Start
- Your VPS public IP address
- Your RDP username and password
- Your current public IP (for IP restriction). You can check by searching “what is my IP” in Google.
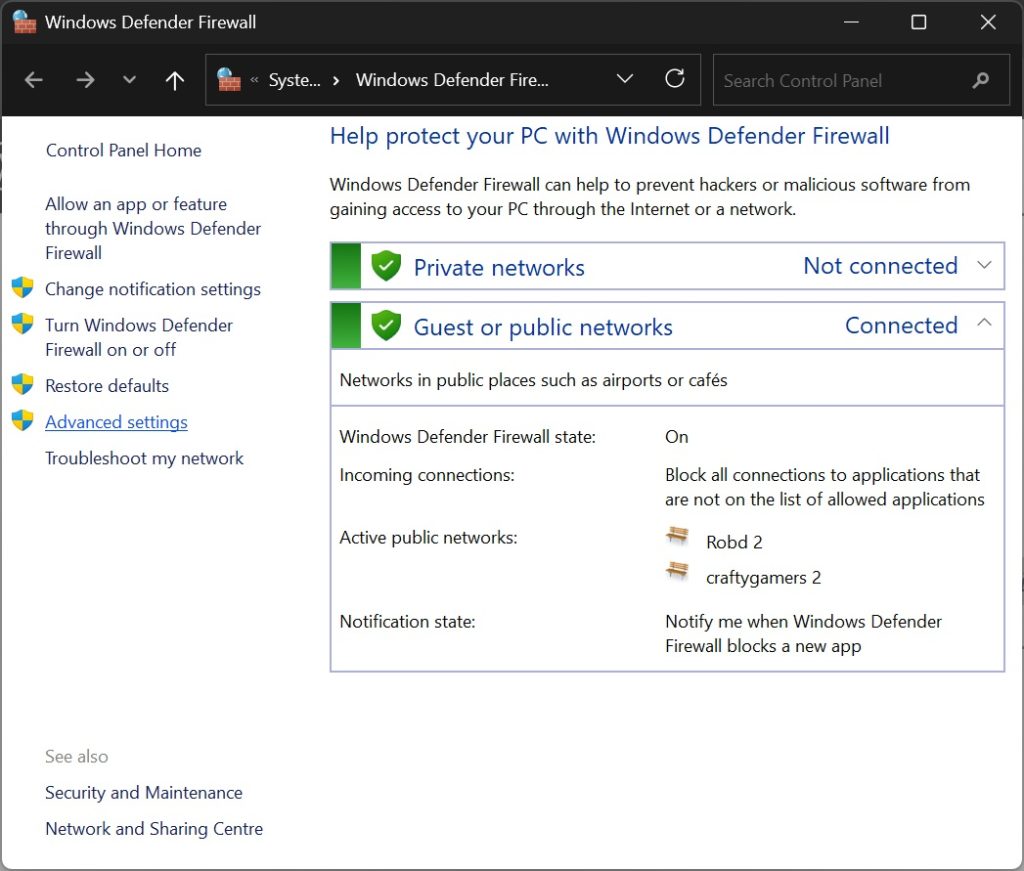
Step 1: Open Windows Defender Firewall Advanced Settings
- Click the Start button
- Type Windows Defender Firewall
- Open it
- Click Advanced settings on the left
Step 2: Choose a Safe New RDP Port
RDP listens on port 3389 by default. We will change it to a less targeted port.
Recommended Port Ranges
- Best choice (recommended): 40000–60000
- Acceptable: 20000–39999
Avoid These Port Ranges
- 1–1023 (reserved/system ports)
- 1024–49151 (commonly used by other services)
- 3389 (default RDP)
Good Example Ports
- 45872
- 51244
- 49221
- 53389
Tip: Write down your chosen port now, you’ll need it to connect later.
Step 3: Check If the Port Is Already in Use
Before changing anything, check that your chosen port is not already being used by another program.
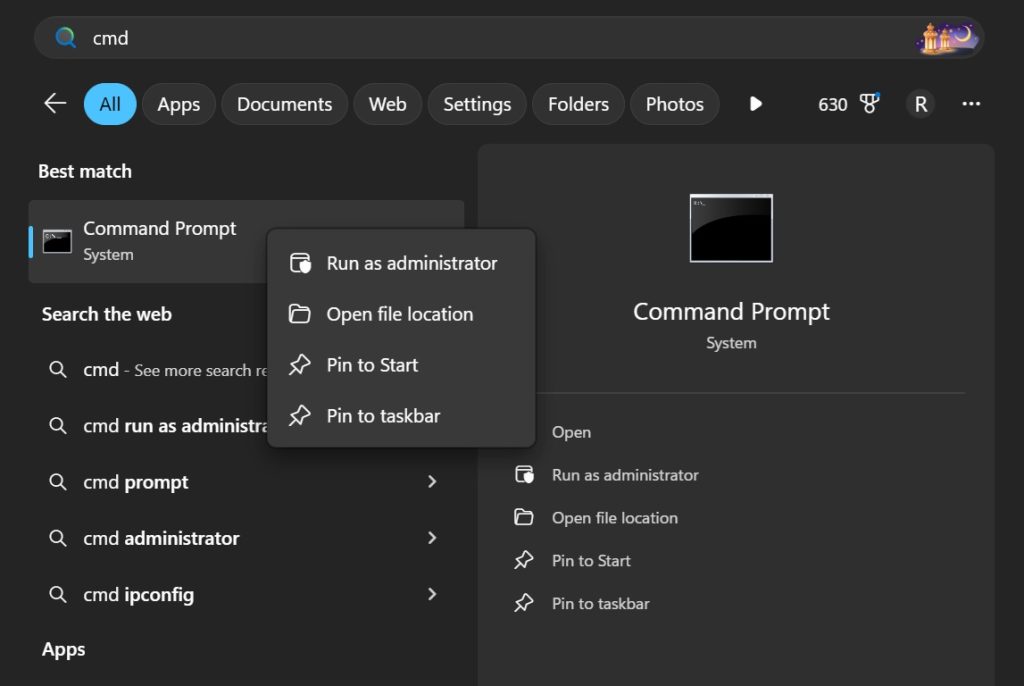
3.1 Open Command Prompt (CMD) as Administrator
- Click Start
- Type cmd
- Right-click Command Prompt
- Click Run as administrator
- Click Yes on the UAC prompt
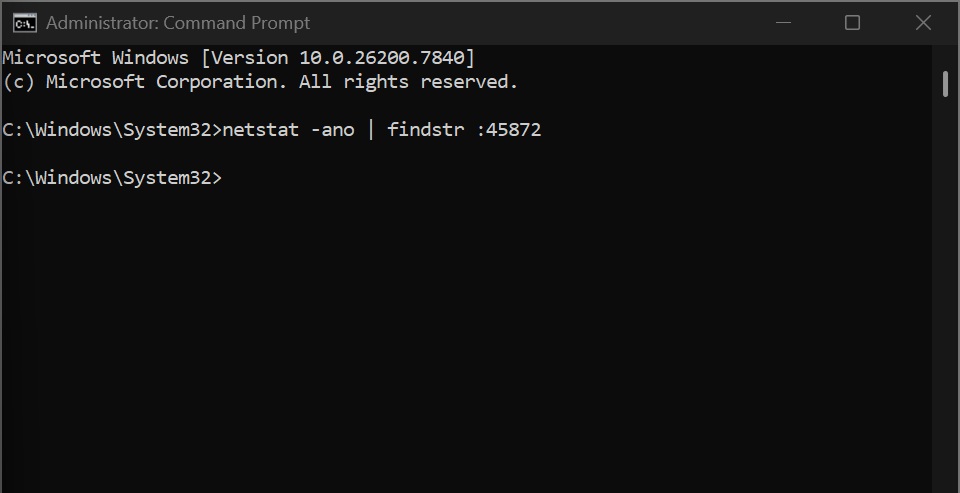
3.2 Run netstat to Check the Port
Replace 45872 with the port you chose:
netstat -ano | findstr :45872
How to read the result:
- If nothing appears → the port is free ✅
- If you see LISTENING → the port is already used ❌
Example of a port in use:
TCP 0.0.0.0:45872 0.0.0.0:0 LISTENING 1234
The last number (1234) is the PID (process ID) using that port.
3.3 If the Port Is in Use (Optional)
If the port is already used, pick a different port and check again. If you want to identify what is using it:
tasklist /FI "PID eq 1234"
Replace 1234 with your PID number from netstat output.
Step 4: Change the RDP Port in the Windows Registry
This changes the port Windows uses for Remote Desktop connections.
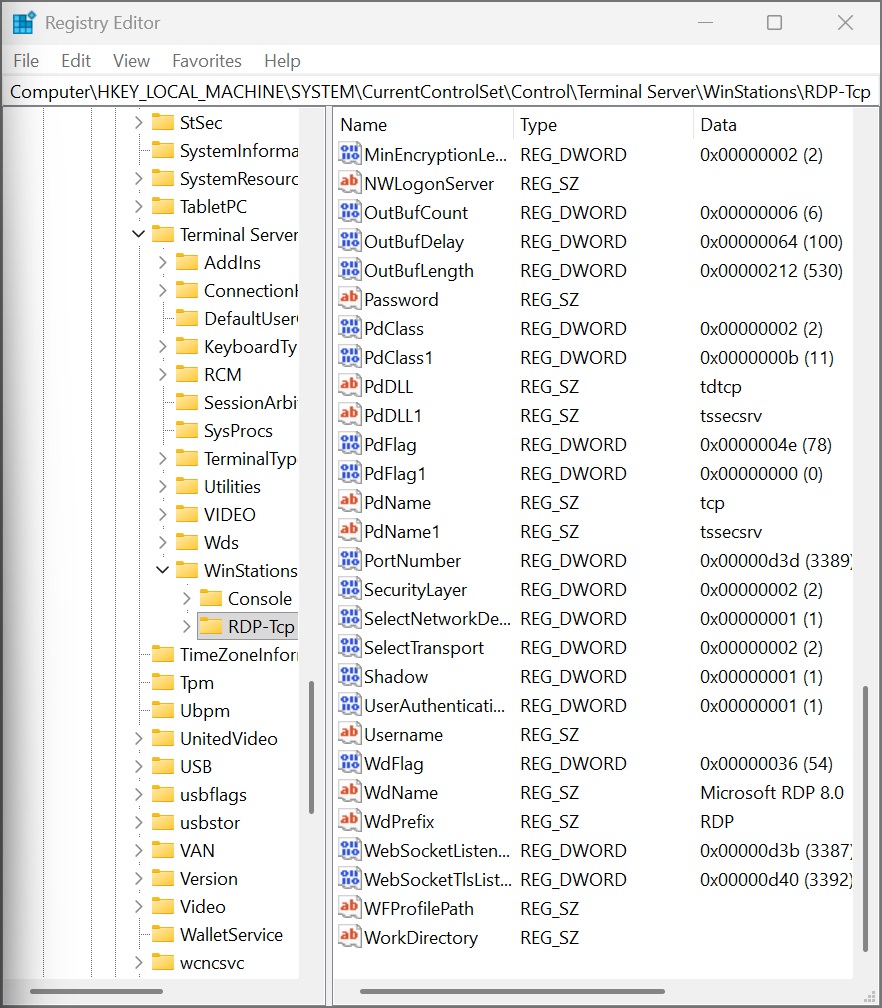
4.1 Open Registry Editor
- Press Windows Key + R
- Type regedit
- Press Enter
- Click Yes if prompted

4.2 Navigate to the RDP Port Setting
Copy and paste this into the Registry address bar:
Computer\HKEY_LOCAL_MACHINE\System\CurrentControlSet\Control\Terminal Server\WinStations\RDP-Tcp
[Insert Screenshot: Registry path showing RDP-Tcp selected]
4.3 Modify the PortNumber Value
- In the right-hand panel, find PortNumber
- Double-click PortNumber
- Select Decimal (IMPORTANT)
- Enter your new port (example: 45872)
- Click OK
Step 5: Create a Windows Firewall Rule for Your New RDP Port
Do this BEFORE restarting Remote Desktop to avoid getting locked out.
- Open Windows Defender Firewall with Advanced Security
- Click Inbound Rules
- Click New Rule… on the right
- Select Port → click Next
- Select TCP
- Select Specific local ports and enter your new port (example: 45872)
- Click Next
- Select Allow the connection → click Next
- Select all profiles (Domain, Private, Public) → click Next
- Name the rule: RDP – Custom Port 45872 (TCP)
- Click Finish
Step 6: Restart Remote Desktop Services
Now apply the new port change.
6.1 Open Command Prompt as Administrator (Again)
If you closed it earlier:
- Click Start → type cmd
- Right-click → Run as administrator
6.2 Restart the RDP Service
net stop termservice
net start termservice
Warning: You may lose your current session. Keep this tab open and be ready to reconnect using the new port.
Step 7: Test RDP Connection Using the New Port
7.1 Open Remote Desktop Connection
- Press Windows + R
- Type mstsc and press Enter
7.2 Connect Using IP:PORT
Enter your VPS IP with the port like this:
203.0.113.10:45872
Only proceed to the next step after you confirm this works.
Step 8: Disable the Default RDP Rule (Port 3389)
Once you confirm the new port works:
- In Inbound Rules, find Remote Desktop – User Mode (TCP-In)
- Right-click → Disable Rule
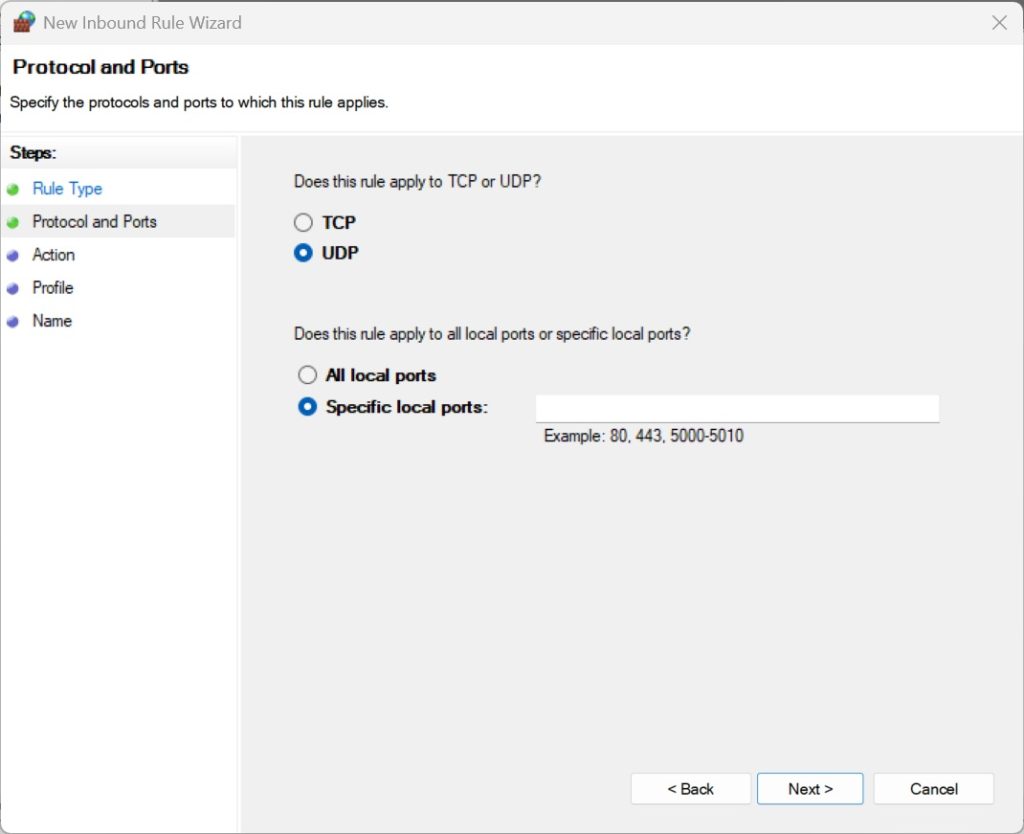
Step 9: Secure UDP for RDP (Recommended)
Modern RDP uses UDP for performance. Many admins prefer to block UDP on the RDP port to reduce attack surface.
Option A: Block UDP on Your RDP Port (Recommended)
- Create a new inbound rule
- Select Port
- Select UDP
- Enter your RDP port (example 45872)
- Select Block the connection
- Name it: Block RDP UDP 45872
Note: Blocking UDP can slightly reduce RDP performance on poor connections, but it improves security.
Step 10: Restrict RDP Access to Your IP Address (Strongest Protection)
This is the biggest security improvement you can make.
- Find your rule: RDP – Custom Port 45872 (TCP)
- Right-click → Properties
- Open Scope tab
- Under Remote IP address choose These IP addresses
- Click Add → enter your public IP
- Click OK → Apply
Tip: If your home IP changes, you will need to add your new IP or you will lock yourself out.
Step 11: Rename the Administrator Account
Attackers target the default username “Administrator”. Rename it to reduce attacks.
- Open Computer Management
- Go to Local Users and Groups → Users
- Right-click Administrator → Rename
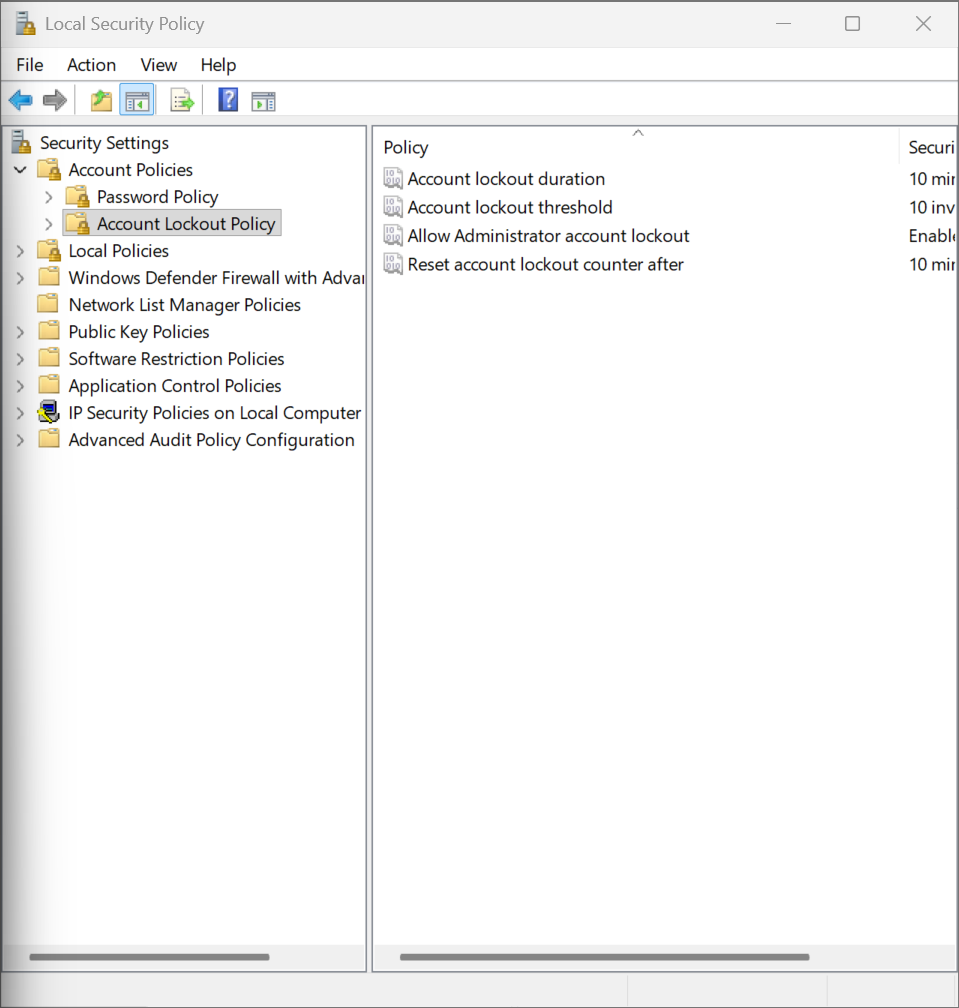
Step 12: Enable Strong Password + Account Lockout Policy
Press Windows + R and type:
secpol.msc
Recommended Settings
- Password length: 12+ characters
- Complexity: enabled
- Account lockout threshold: 5 attempts
- Lockout duration: 15 minutes
- Reset counter after: 15 minutes
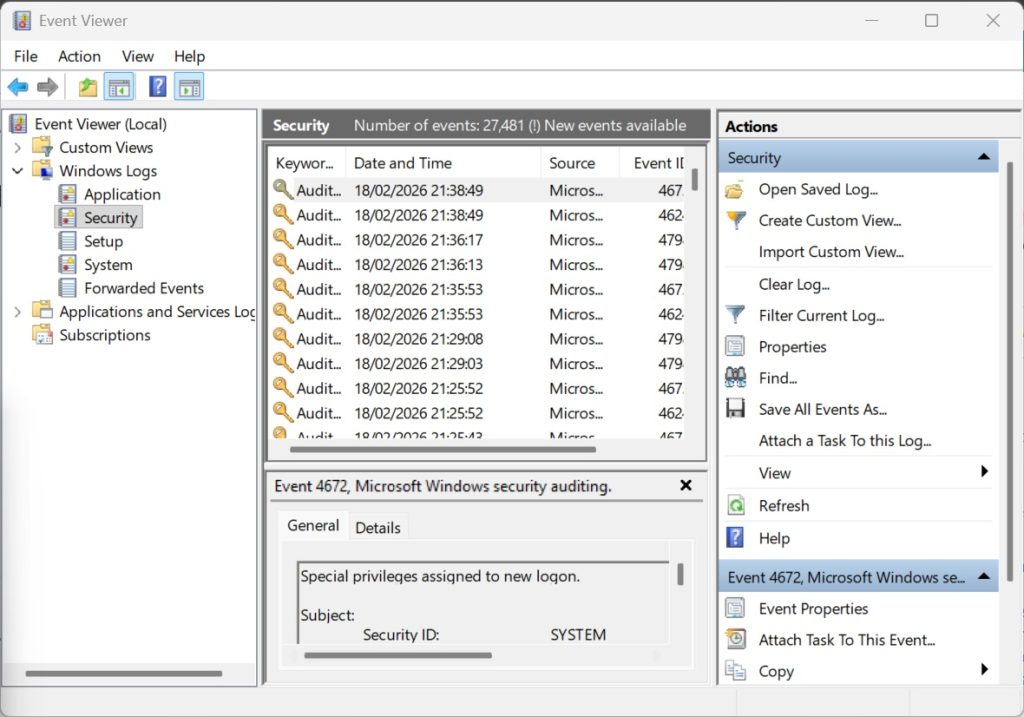
Step 13: Monitor Failed RDP Login Attempts
Open Event Viewer:
- Windows Logs → Security
Look for Event ID:
4625
Recommended Secure Setup Summary (Best Practice)
- ✔ Change RDP from 3389 to a high port (e.g. 45872)
- ✔ Allow only TCP for RDP
- ✔ Block UDP (optional but recommended)
- ✔ Restrict RDP access by your IP
- ✔ Enable NLA
- ✔ Rename Administrator
- ✔ Strong password + account lockout policy
Troubleshooting
RDP Not Connecting After Changing Port?
- Make sure you used IP:PORT in Remote Desktop (example:
203.0.113.10:45872) - Make sure the firewall inbound rule exists for the new port
- Make sure you selected Decimal in Registry
- Check the service is listening:
netstat -ano | findstr :45872
You should see LISTENING on your new port.
Final Thoughts
A default Windows VPS is extremely easy to attack. Following this guide will massively reduce automated attack attempts and make your VPS far more secure.
Extra tip: The most secure option is to use a VPN and allow RDP only over the VPN.